SpringCould-Admin
在项目运行时,偶尔需要排查问题,需要看日志信息,但是平常只开了info级别的,对于调试找问题不是很方便,所以需要改日志重启,这里在不重启的情况下修改springboot的日志级别
名词介绍
spring-boot-starter-actuator 是监控springboot的健康情况的一个依赖工具包
包含三类功能
- 应用配置:日志级别、环境变量等
- 度量指标:心跳、内存、中间件状态
- 操作控制:重启、更新配置等
简单实现动态修改日志级别
引入依赖
1
implementation 'org.springframework.boot:spring-boot-starter-actuator'
配置
loggers接口,这里分别开了三个接口/actuator/loggers、/actuator/info、/actuator/health1
management.endpoints.web.exposure.include=loggers,health,info
访问
GET /actuator/loggers就可以得到所有包的日志级别了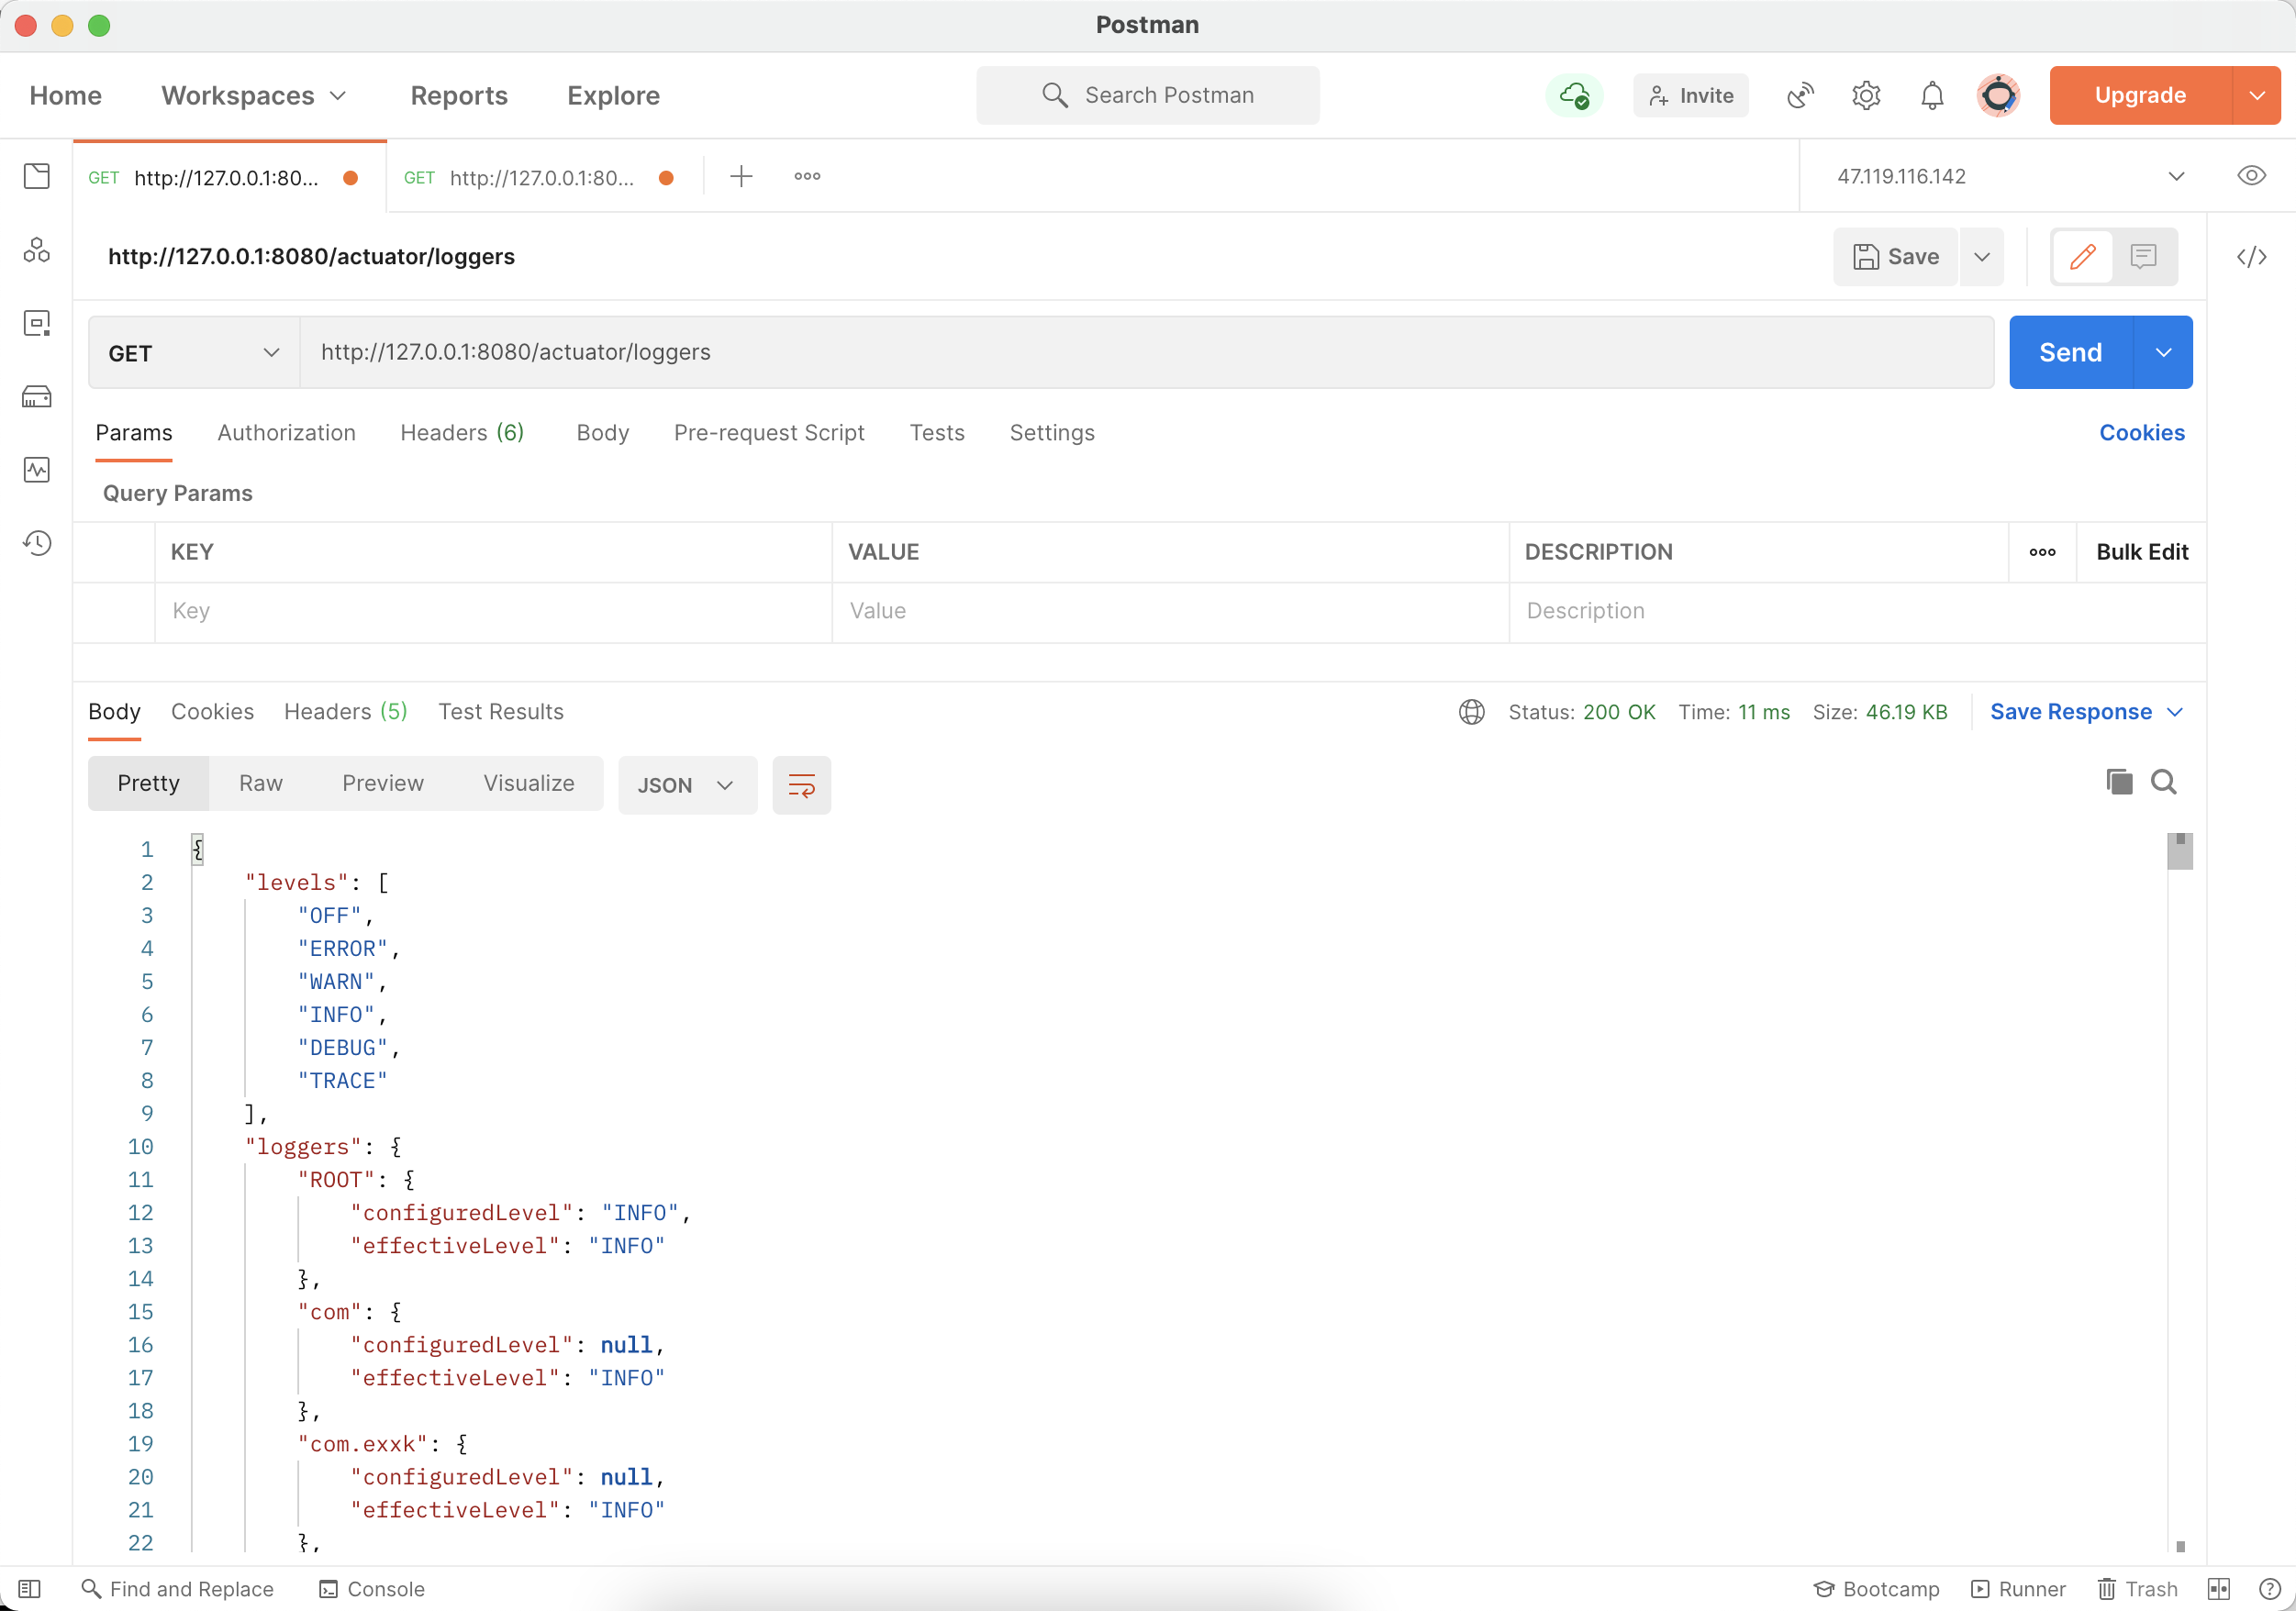
查询特定包的日志级别
GET /actuator/loggers/<package path>1
2
3
4
5
6
7# GET /actuator/loggers/com.exxk.adminClient
---------------------------------------------
# RETURN
{
"configuredLevel": null,
"effectiveLevel": "INFO"
}修改特定包的日志级别
POST /actuator/loggers/<package path>然后添加BODY JSON内容{"configuredLevel": "DEBUG"},请求成功后对应包的日志级别就改变了,访问就会输出设置的日志级别的日志了1
2
3
4
5
6
7# POST /actuator/loggers/com.exxk.adminClient
# BODY
{
"configuredLevel": "DEBUG"
}
-----------------------------------------------
# RETURN 204 No Content
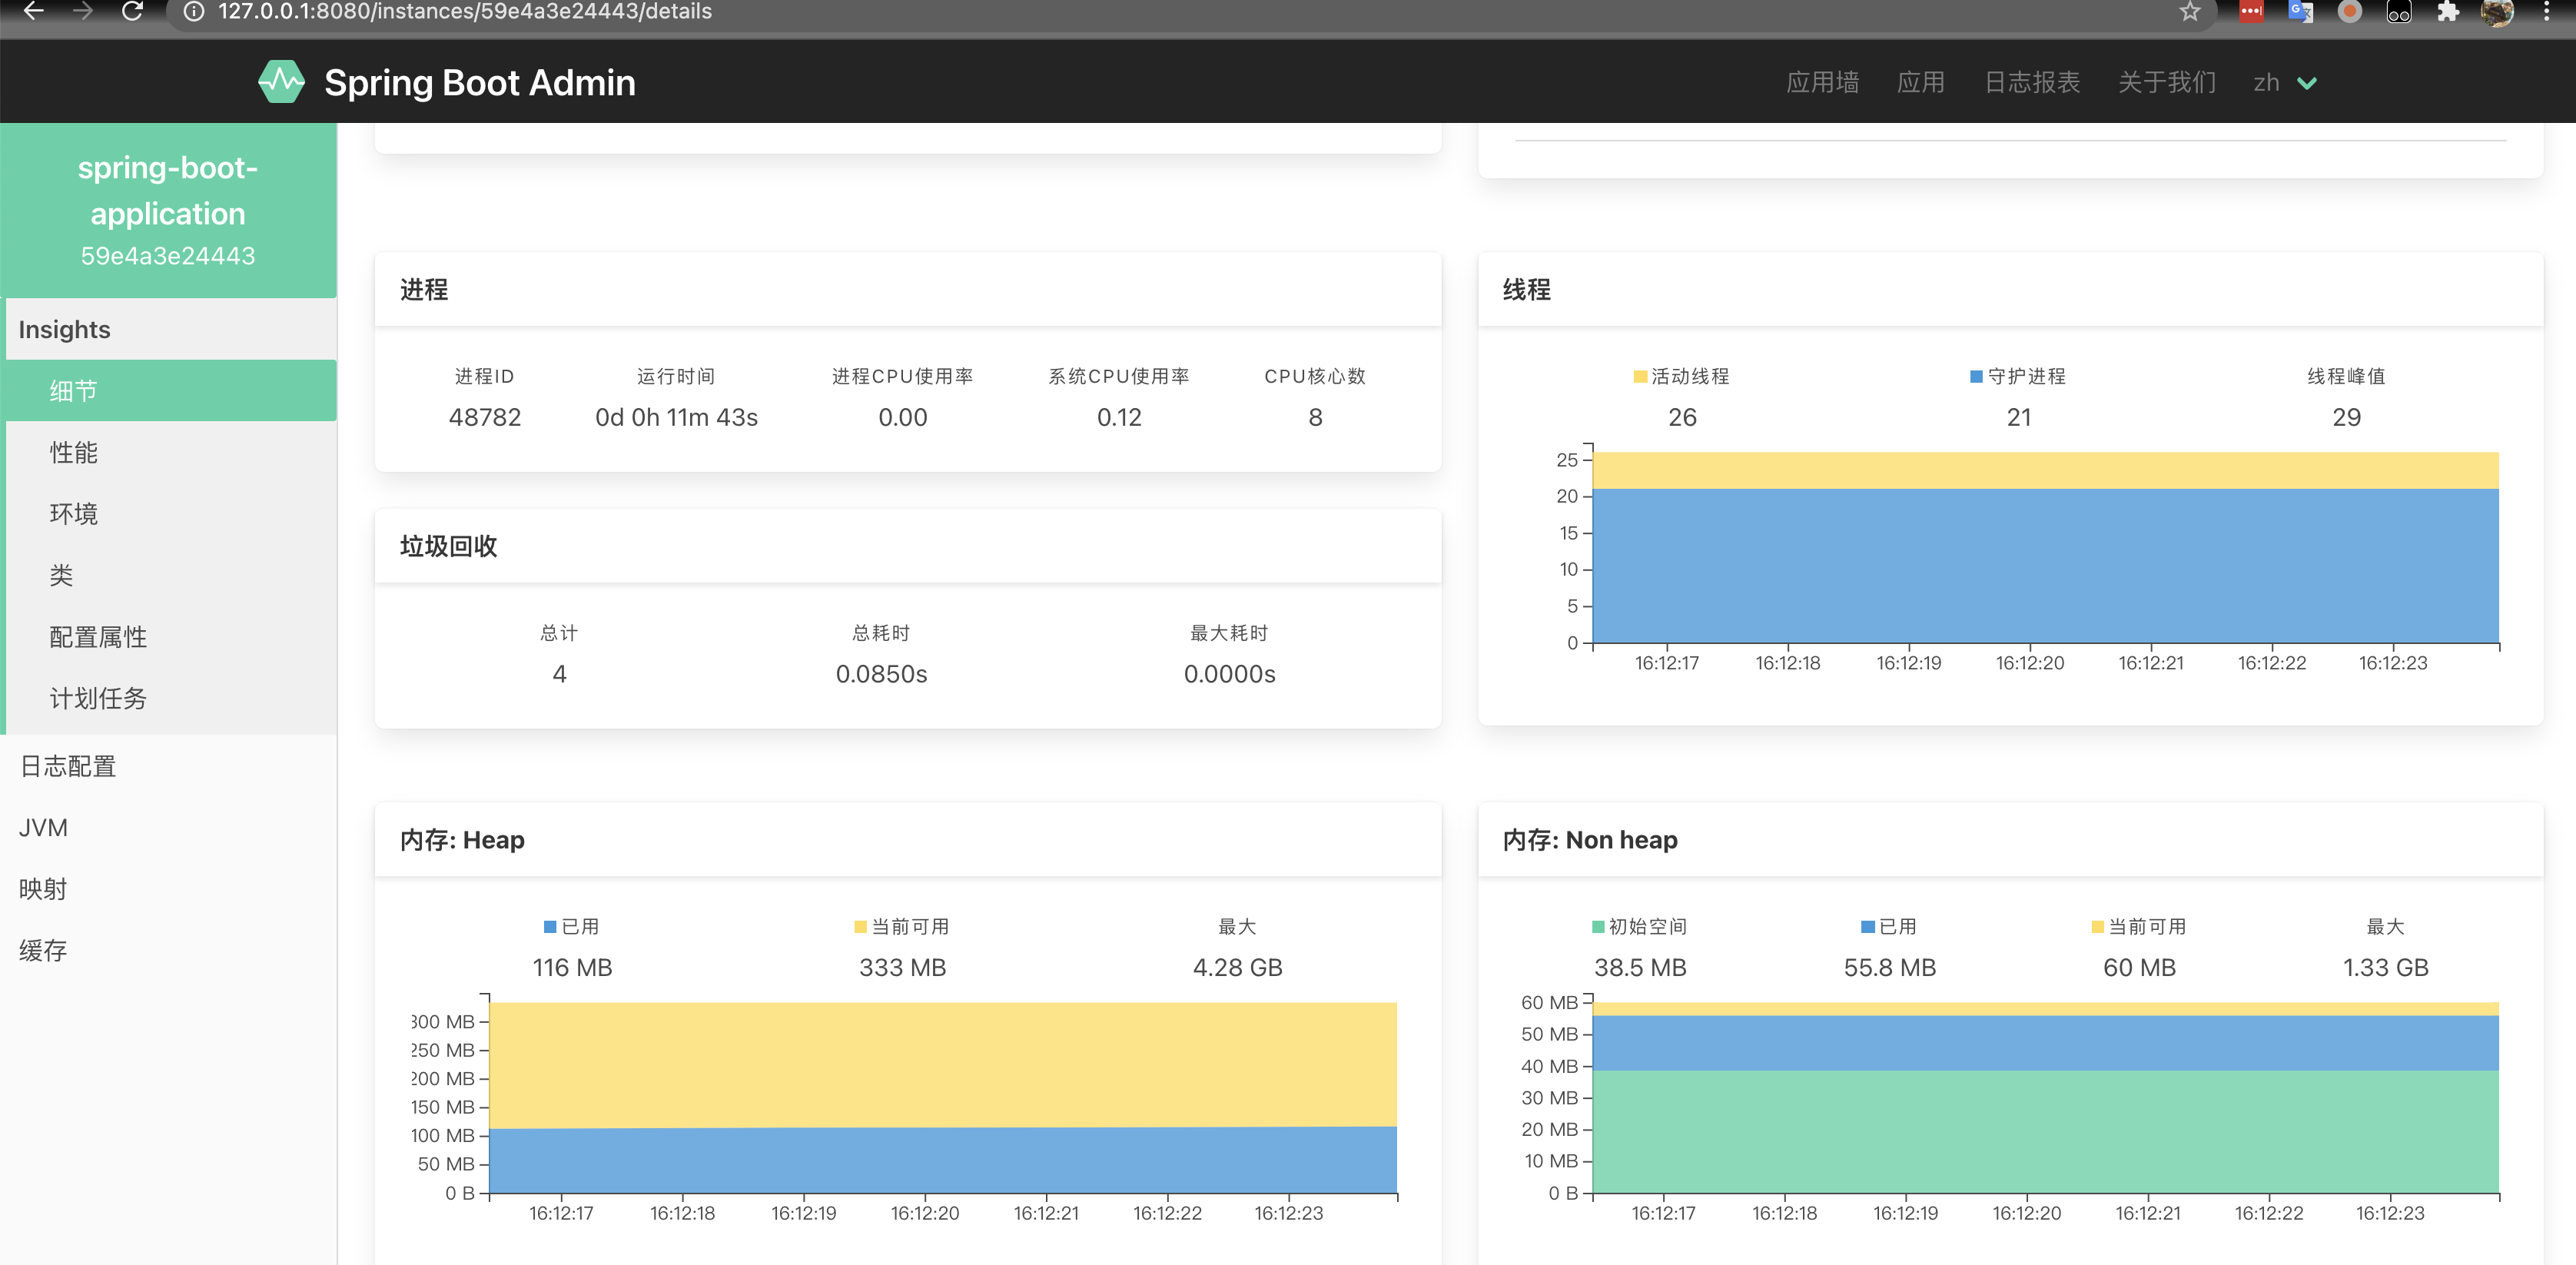
Spring Boot Admin可视化管理服务
服务端配置
引入依赖,注意版本号要和spring boot的版本一致,不然启动会报错
1
2// https://mvnrepository.com/artifact/de.codecentric/spring-boot-admin-starter-server
implementation group: 'de.codecentric', name: 'spring-boot-admin-starter-server', version: '2.2.2'在启动类上面添加注解
@EnableAdminServer运行,然后访问
http://127.0.0.1:8080
添加用登陆校验 (未配置完,暂时不需要)
添加依赖
1
2
3// https://mvnrepository.com/artifact/de.codecentric/spring-boot-admin-server-ui-login
implementation group: 'de.codecentric', name: 'spring-boot-admin-server-ui-login', version: '1.5.7'
implementation 'org.springframework.boot:spring-boot-starter-security'添加Spring Security配置
1
2
3
4
5
6
7
8
9
10
11
12
13
14
15
16
17
18
19
20
21
22
23
24
25
26
27
28
29
30
31
32
33
34
35
36
37
38
39
public class SecuritySecureConfig extends WebSecurityConfigurerAdapter {
private final AdminServerProperties adminServer;
public SecuritySecureConfig(AdminServerProperties adminServer) {
this.adminServer = adminServer;
}
protected void configure(HttpSecurity http) throws Exception {
SavedRequestAwareAuthenticationSuccessHandler successHandler = new SavedRequestAwareAuthenticationSuccessHandler();
successHandler.setTargetUrlParameter("redirectTo");
successHandler.setDefaultTargetUrl(this.adminServer.path("/"));
http.authorizeRequests(
(authorizeRequests) -> authorizeRequests.antMatchers(this.adminServer.path("/assets/**")).permitAll()
.antMatchers(this.adminServer.path("/login")).permitAll().anyRequest().authenticated()
).formLogin(
(formLogin) -> formLogin.loginPage(this.adminServer.path("/login")).successHandler(successHandler).and()
).logout((logout) -> logout.logoutUrl(this.adminServer.path("/logout"))).httpBasic(Customizer.withDefaults())
.csrf((csrf) -> csrf.csrfTokenRepository(CookieCsrfTokenRepository.withHttpOnlyFalse())
.ignoringRequestMatchers(
new AntPathRequestMatcher(this.adminServer.path("/instances"),
HttpMethod.POST.toString()),
new AntPathRequestMatcher(this.adminServer.path("/instances/*"),
HttpMethod.DELETE.toString()),
new AntPathRequestMatcher(this.adminServer.path("/actuator/**"))
))
.rememberMe((rememberMe) -> rememberMe.key(UUID.randomUUID().toString()).tokenValiditySeconds(1209600));
}
// Required to provide UserDetailsService for "remember functionality"
protected void configure(AuthenticationManagerBuilder auth) throws Exception {
auth.inMemoryAuthentication().withUser("user").password("{noop}password").roles("USER");
}
}在配置文件设置密码
1
2spring.boot.admin.client.username=admin
spring.boot.admin.client.password=admin
客户端配置
添加依赖
1
implementation group: 'de.codecentric', name: 'spring-boot-admin-starter-client', version: '2.2.2'
添加配置
1
2
3
4
5spring.boot.admin.client.url=http://localhost:8080
#生产根据需要开放端口,*代表全部开放
management.endpoints.web.exposure.include=*
#健康信息显示所有
management.endpoint.health.show-details=always启动运行,就可以看到该springboot已经注册到了admin server里面去了,可以去日志配置界面动态修改日志级别了
常见问题
/actuator/httptrace网络接口追踪404,解决建议用Sleuth