STM32-Dev-Mac
stm32开发环境搭建(mac)
环境工具
- CLion
- STM32CubeMX 记录见:mac系统安装STM32CubeMX
- Segger 下载 Ozone - The J-Link Debugger
- 安装编译器:arm-gcc-none-eabi-gcc
brew cask install gcc-arm-embedded - 安装stlink
brew install stlink - 安装openocd 执行
brew install openocd
运行测试第一个跑马灯
环境准备
mac os系统
开发板
NUCLEO-F401RE其中mcu型号stm32f401RETx安装项目初始化软件STM32CubeMX 步骤见mac系统安装STM32CubeMX
安装编译器
arm-gcc-none-eabi-gcc执行brew cask install gcc-arm-embedded安装stlink下载器
brew install stlink开发板
NUCLEO-F401RE跳线如图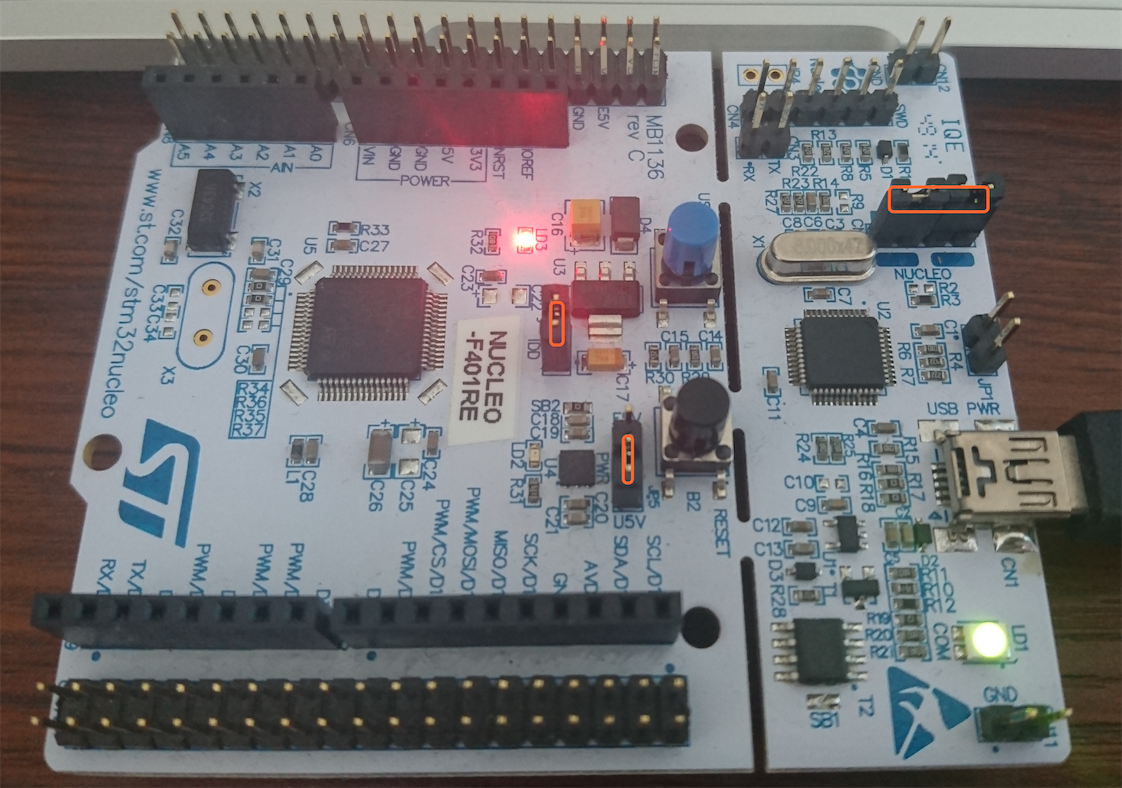
项目搭建步骤:
初始化项目工程见STM32CubeMX使用之初始化项目
进入生成的工作目录执行
make提示错误
/bin/sh: /arm-none-eabi-gcc: No such file or directory解决,修改Makefile1
2# BINPATH是指arm-none-eabi-gcc的路径,可以通过执行which arm-none-eabi-gcc得到路径
BINPATH = /usr/local/bin/提示错误
1
2build/main.o: In function `main':
/Users/xuanleung/IdeaProjects/f401demo/Src/main.c:75: multiple definition of `main'解决修改
Makefile,删除里面重复的,#标注为有重复,删除即可1
2
3
4
5
6
7
8
9
10
11
12
13
14
15
16
17
18
19
20
21
22
23C_SOURCES = \
Drivers/STM32F4xx_HAL_Driver/Src/stm32f4xx_hal_pwr_ex.c \
Drivers/STM32F4xx_HAL_Driver/Src/stm32f4xx_hal_cortex.c \
Drivers/STM32F4xx_HAL_Driver/Src/stm32f4xx_hal.c \
Drivers/STM32F4xx_HAL_Driver/Src/stm32f4xx_hal_dma_ex.c \
Drivers/STM32F4xx_HAL_Driver/Src/stm32f4xx_hal_flash_ramfunc.c \
#Src/stm32f4xx_it.c \
Src/stm32f4xx_it.c \
Drivers/STM32F4xx_HAL_Driver/Src/stm32f4xx_hal_flash_ex.c \
Drivers/STM32F4xx_HAL_Driver/Src/stm32f4xx_hal_dma.c \
/Src/system_stm32f4xx.c \
#Src/stm32f4xx_hal_msp.c \
Drivers/STM32F4xx_HAL_Driver/Src/stm32f4xx_hal_tim.c \
Drivers/STM32F4xx_HAL_Driver/Src/stm32f4xx_hal_uart.c \
Drivers/STM32F4xx_HAL_Driver/Src/stm32f4xx_hal_rcc_ex.c \
Drivers/STM32F4xx_HAL_Driver/Src/stm32f4xx_hal_flash.c \
Drivers/STM32F4xx_HAL_Driver/Src/stm32f4xx_hal_pwr.c \
Drivers/STM32F4xx_HAL_Driver/Src/stm32f4xx_hal_rcc.c \
#Src/main.c \
Drivers/STM32F4xx_HAL_Driver/Src/stm32f4xx_hal_tim_ex.c \
Src/stm32f4xx_hal_msp.c \
Drivers/STM32F4xx_HAL_Driver/Src/stm32f4xx_hal_gpio.c \
Src/main.c再重新执行
make,得到编译成功的文件了1
2
3
4
5/usr/local/bin//arm-none-eabi-size build/f401demo.elf
text data bss dec hex filename
5460 20 1636 7116 1bcc build/f401demo.elf
/usr/local/bin//arm-none-eabi-objcopy -O ihex build/f401demo.elf build/f401demo.hex
/usr/local/bin//arm-none-eabi-objcopy -O binary -S build/f401demo.elf build/f401demo.bin下载bin文件到开发板
NUCLEO-F401RE,执行st-flash write ./build/xxxxx.bin 0x8000000,如果下载失败重启单片机和检查跳线帽修改src下面的
main.c添加跑马灯代码1
2
3
4
5
6
7
8
9
10while (1)
{
/* USER CODE END WHILE */
/* USER CODE BEGIN 3 */
HAL_GPIO_WritePin(LD2_GPIO_Port, LD2_Pin, GPIO_PIN_RESET);
HAL_Delay(500);
HAL_GPIO_WritePin(LD2_GPIO_Port, LD2_Pin, GPIO_PIN_SET);
HAL_Delay(500);
}重新编译
make和下载st-flash write ./build/f401demo.bin 0x8000000下载完成后ld2就会闪烁
使用CLion进行项目编译运行
操作记录:mac下stm32CubeMX+CLion+openocd开发环境
- 使用STM32CubeMX重新初始化项目,选择
SW4STM32
问题
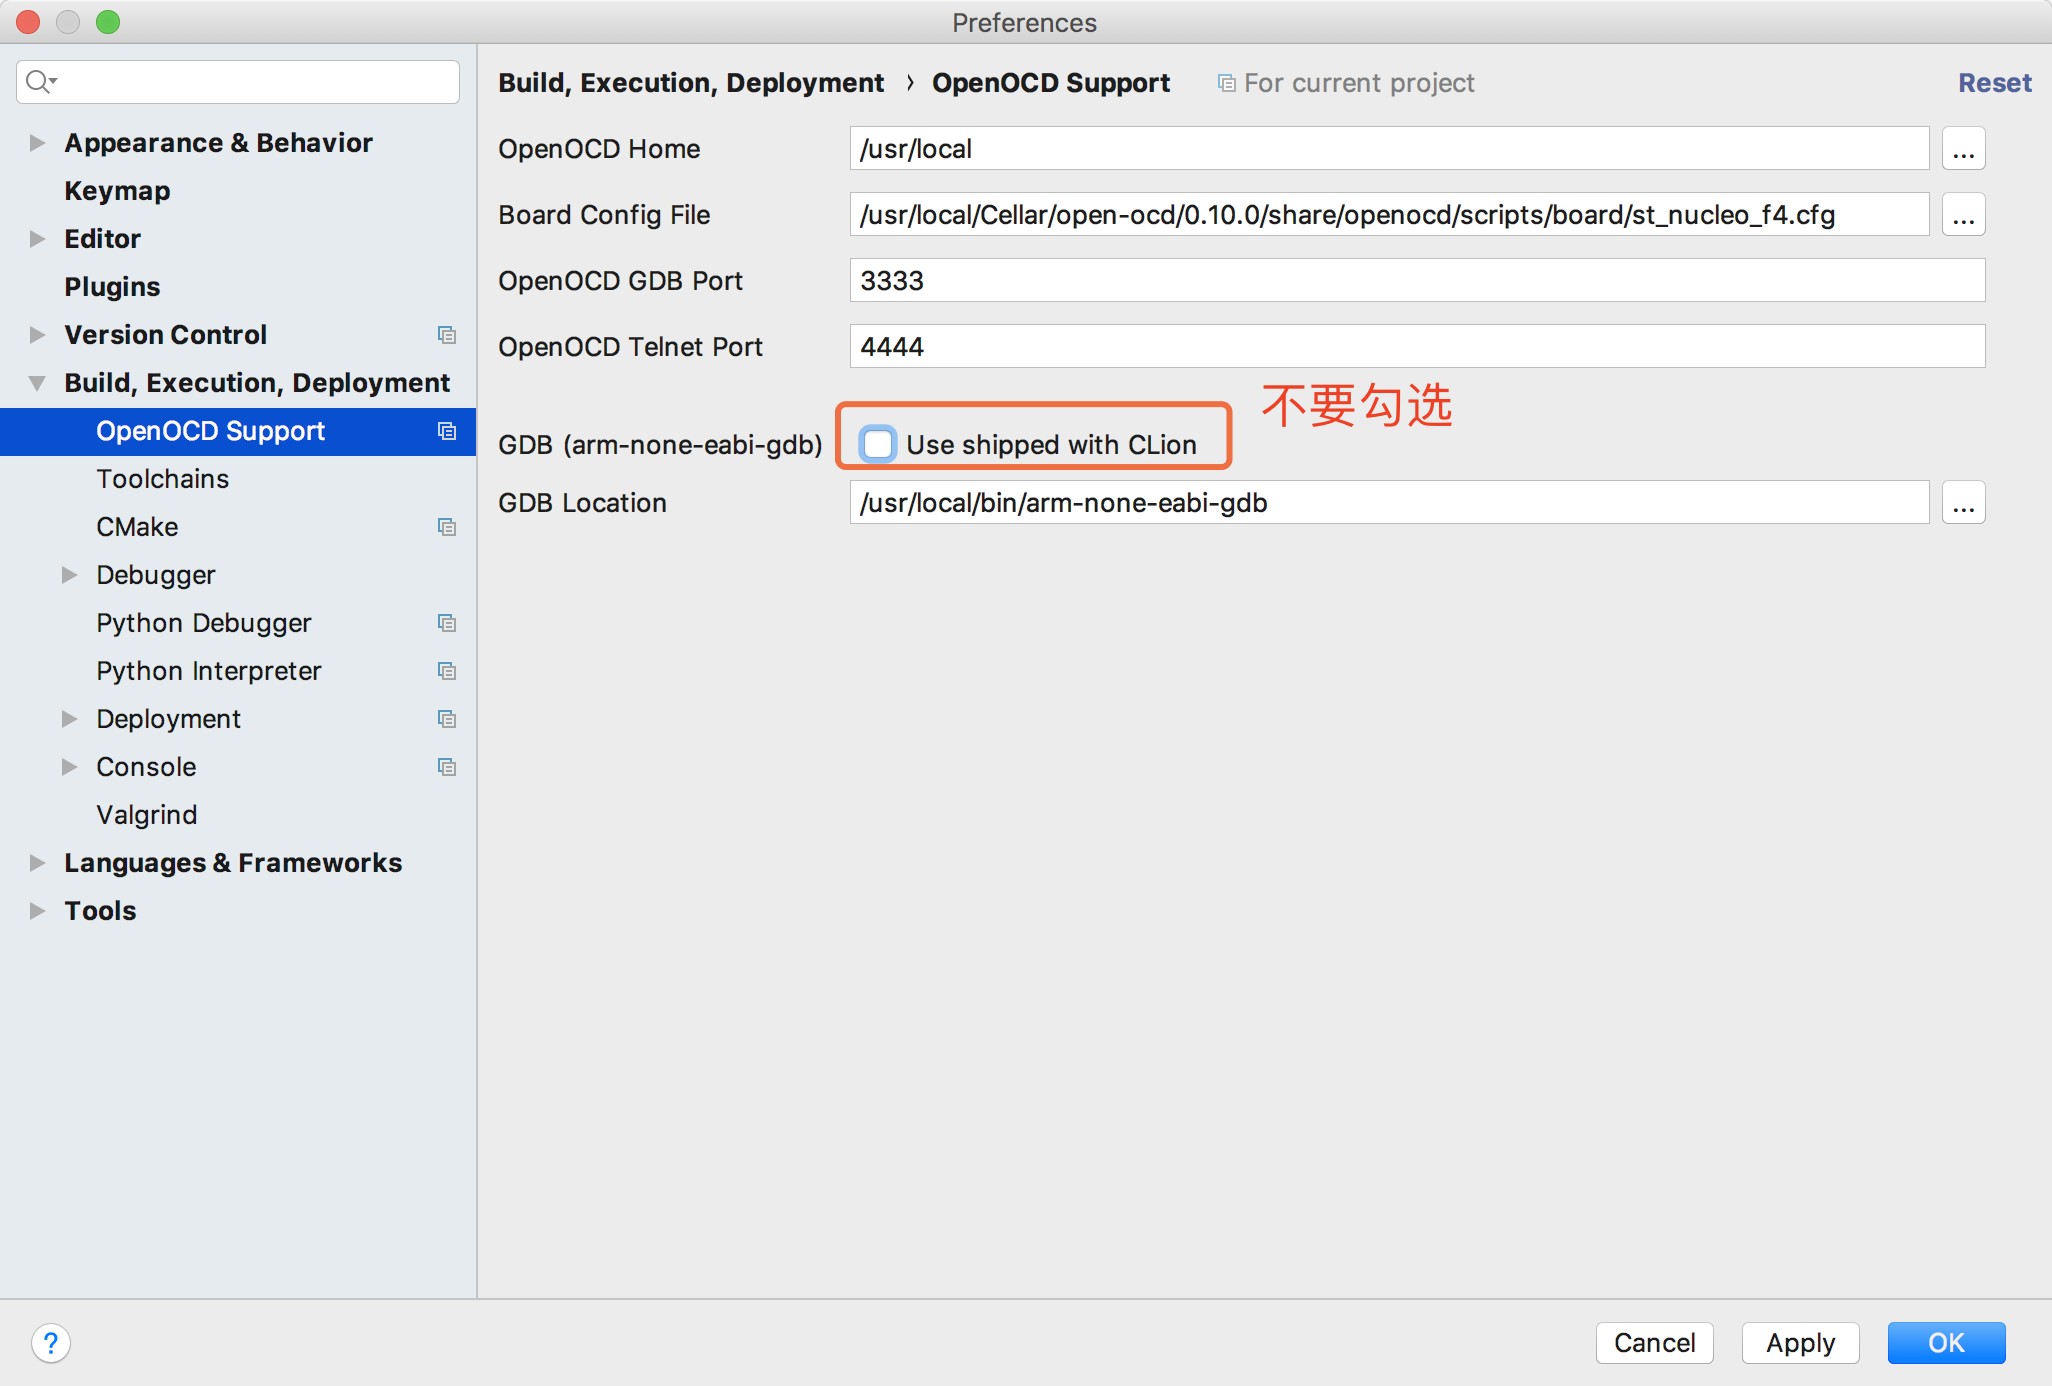
debug提示如下错误:
1 | Cannot load symbol file: "/Users/xuanleung/IdeaProjects/f401re_demo/cmake-build-debug/f401re_demo.elf": not in executable format: File format not recognized |
解决:取消勾选
参考
macOS 下用 Clion和OpenOCD开发 STM32(st-link和STM32CubeMX)
CLion for embedded development
CLion for Embedded Development Part II